
WordPress Security Checklist, Tips and Recommendations
The open-source WordPress core software is a very reliable and secure system. Most of the security vulnerabilities in WordPress websites arise from poor server configuration, poorly coded themes, and plugins.
In this article, we will cover a WordPress security checklist you can apply for your next project and protect your site against security vulnerabilities.
This checklist is a reminder to myself about the security measures I need to go through before I publish any website; I hope you will find it helpful too.
WordPress security checklist:
- Install an SSL certificate
- Add HTTP security headers
- Upgrade to PHP 7
- Protect the admin wp-login page
- Hide the username
- Disable JSON REST API
- Disable File Editing from the WordPress dashboard
- Disable PHP File Execution in specific directories
- Disable directory listing/browsing
- Tips and recommendations
#1 Install an SSL certificate
An SSL certificate encrypts the data between the website’s server and the user’s browser to establish a secure connection. SSL certificates not only encrypt data and authenticate your website/organization but also provide a sense of trust to your site visitors.
Most browsers, including Chrome, Safari, and Firefox, will display a warning message when no valid certificate is installed on your server which leads to a decrease in website visitors.
Search engines like Google will improve rankings for websites with SSL certificates. You can purchase an SSL certificate for around $5/ year from websites like ssls.com or namecheap.com.
The installation of an SSL certificate is a straightforward process and can be done without any coding skills. Visit the how to install an SSL certificate in cPanel article to complete the SSL installation on your server.
After you install your SSL certificate make sure to force https on your site by adding the following code to your .htaccess file:
<IfModule mod_rewrite.c>
RewriteEngine On
RewriteCond %{HTTPS} off
RewriteRule ^(.*)$ https://%{HTTP_HOST}%{REQUEST_URI} [L,R=301]
</IfModule>
#2 Add HTTP Security Headers
An HTTP response header is a web server response delivered to the browser along with the webpage contents. The response headers include metadata information such as the status code, request method, cache-control, content-encoding, content-type, and so on. Learn more about HTTP headers here.
We can configure these HTTP headers to add extra layers of security to prevent attacks and improve website security.
Follow the steps below to add HTTP security headers to your WordPress website:
- Log in to Cpanel.
- Click on File Manager.
- Open the
.htaccessfile in the root folder. - Add the following code snippet at the end of the file and save it.
# Ensures website is accessible with HTTPS only
Header set Strict-Transport-Security “max-age=31536000” env=HTTPS
# Protects against cross-site scripting attacks
Header set X-XSS-Protection "1; mode=block"
# Instructs the browser not to perform MIME sniffing
Header set X-Content-Type-Options nosniff
# Protects against clickjacking and other privacy vulnerabilities
Header always append X-Frame-Options SAMEORIGIN
# Prevents URLs with sensitive information from showing up
Header set Referrer-Policy "origin"
Note:
You may have one or more HTTP security headers already set up in your server if you use a security or cache plugin in your WordPress site. Visit securityheaders.com to check which HTTP response headers you are missing.
#3 Upgrade to PHP 7
As you may already know, WordPress uses the PHP scripting language to generate and render HTML pages on the fly. One of the many aspects of website performance depends on the speed at which PHP executes these scripts.
Running an older version of PHP on your server not only delivers poor performance but exposes your WordPress website to a wide range of security vulnerabilities.
Released in late 2016, PHP 7 introduces plenty of changes, including new features, security, and performance improvements. In fact, PHP 7 is the official recommended version for WordPress.
Upgrading to PHP 7 can boost site performance to up to 50%.
Should you upgrade to PHP 7?
If you are using an outdated theme, infrequently updated plugins, or custom coded features, it’s better to hold on.
If you are ready, there are some precautions you can take before making the switch:
Before upgrading to PHP 7:
- Make sure your theme and plugins are compatible with PHP 7.
- Do a full website backup.
How to upgrade to PHP 7
If you are using a hosting service that provides Cpanel, chances are you can do this on your own.
- Go to the software section in Cpanel.
- Click on Select PHP Version.
- Select the latest PHP 7 version from the dropdown.
- Click “Set as current” to save the changes.
That’s it, your website should be running on PHP 7 now. Visit your website to make sure everything is ok.
#4 Protect the WordPress admin login page
Most people and especially attackers know that the administration dashboard for the majority of WordPress websites can be accessed by adding /wp-login.php or /wp-admin after the domain name. As you know, this opens the door for a brute-force attack where hackers try to guess your username and password.
In this section, we will cover three different ways to protect, restrict, or hide access to the administration login page, commonly referred to as wp-login or wp-admin.
Option 1 – Password Protect wp-login and wp-admin page access
Password protecting your wp-login and wp-admin pages provides an extra layer of security by requesting a username and password to access the login admin area on your WordPress website.
The easiest way to password protect your wp-admin directory is by going to Directory Privacy under the Files Section in Cpanel.
Password protecting the wp-admin directory also protects the wp-login.php page since it is located inside this directory.
Please visit How to password protect wp-admin in Cpanel for detailed instructions.
If you don’t have the Directory Privacy feature in your hosting account, please follow the steps below to password protect your login admin page by uploading a .htpasswd configuration file to your root server folder.
A .htpasswd file stores encrypted usernames and passwords to protect folders and directories stored in the server. In order to protect the WordPress login page, we need to upload a .htpasswd file to the server:
- Visit Htpasswd Generator and enter a hard to guess username and password and click Create .htpasswd file.
- Copy the generated code displayed at the top of the form, as shown in the picture below:
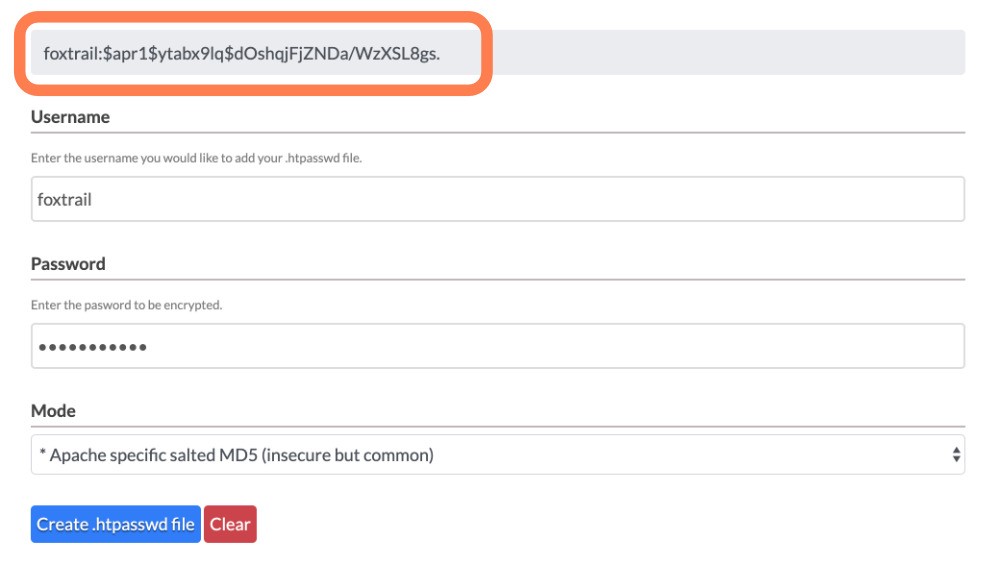
htpasswd file online creation example. - Create a new file in the root directory of your hosting account with the name
.htpasswdand paste the code from the htpasswd generator. - Open .
htaccessin the root directory and add the following code:<Files ~ “^\.ht”> Order allow,deny Deny from all </Files> # Protect wp-login <Files wp-login.php> AuthUserFile ~/.htpasswd AuthName “Private access” AuthType Basic require user yourusername </Files>Make sure to replace your username with your own username from the Htpasswd generated file. Save your .htaccess file, and that’s it.
Option 2 — Change the default wp-login URL
Changing the default wp-login access point from example.com/wp-login.php to your custom URL example.com/your-custom-login-name.php is a great way to protect the main access point to your site administration area.
There are a few options for changing the default wp-login URL, in this article, we will cover two.
Changing the wp-login URL With a Plugin (Recommended)
I highly recommend using the WPS Hide Login plugin as it doesn’t alter core files, or add rewrite rules. It’s very easy to install and set up.
If you are an experienced WordPress developer and you are like me and like to minimize the amount plugins on your WordPress site, then let’s do it manually — no plugin necessary.
Manually changing the wp-login URL (caution)
Keep in mind that altering core WordPress files is not recommended and should be avoided unless you are comfortable doing it. Before proceeding with changing the wp-login URL manually, please do a full website backup.
Warnings:
- You have to redo this process every time you update WordPress as the core files will be replaced. Another solution is to simply remove the new added wp-login.php file after each WordPress update on your site.
- The logout functionality will not work as expected — you will need to replace the wp-login.php part in the logout URL to match the new wp-login file name.
To manually change the wp-login URL:
- Access the
wp-login.phpfile and copy the entire contents. - Open your favorite code editor and paste the code.
- Find and replace every instance of wp-login with whatever you want to use, for example, wp-entrance-me or something similar.
- Rename and save the file with the new URL. In our case, the new file name should be
wp-entrance-me.php. - Upload the new file to the same location as your
wp-login.php. - Delete
wp-login.php.
That’s it, your WordPress login page should be now accessible with the new URL, in our case example.com/wp-entrance-me.php. All requests to wp-admin or wp-login will take users to the default not found page — a 404 page.
#5 Hide the WordPress Username
Is exposing your WordPress username a security vulnerability? It depends on who you ask. This has been the subject of countless articles, blog posts, YouTube videos, and podcasts. Here I outlined why is a good idea to hide the username:
Why you should hide the username in WordPress:
- A username gives attackers 50% of the information needed to access your admin area — they just need to crack your password.
- Your site will not qualify as an easy target and will deter hackers.
- If hackers have your username, they will overload your server, trying to guess the password, which can increase server resources and slow down your site.
Exposing usernames on your site can trigger a cascade of security vulnerabilities. Let’s fix it.
When you first create a user in WordPress, an author URL is generated, which is available by visiting www.example.com/author/johndoe/. By default, WordPress assigns the username to the Nickname.
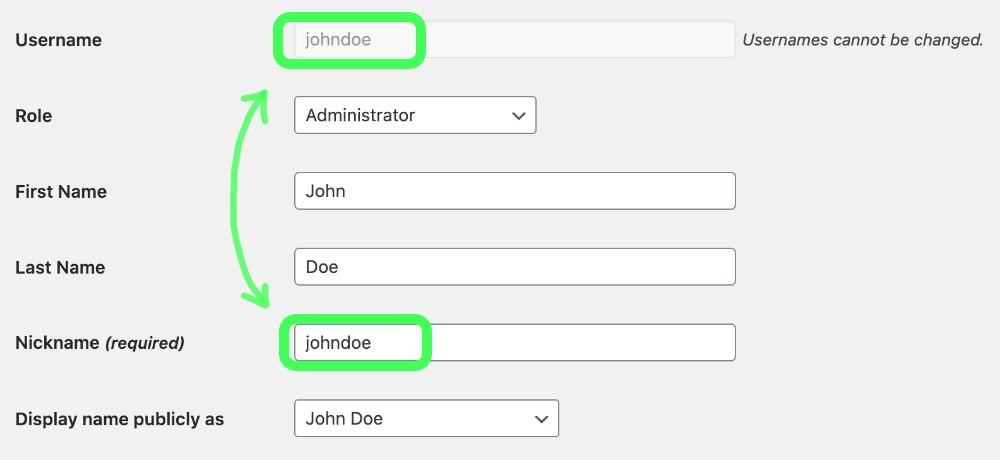
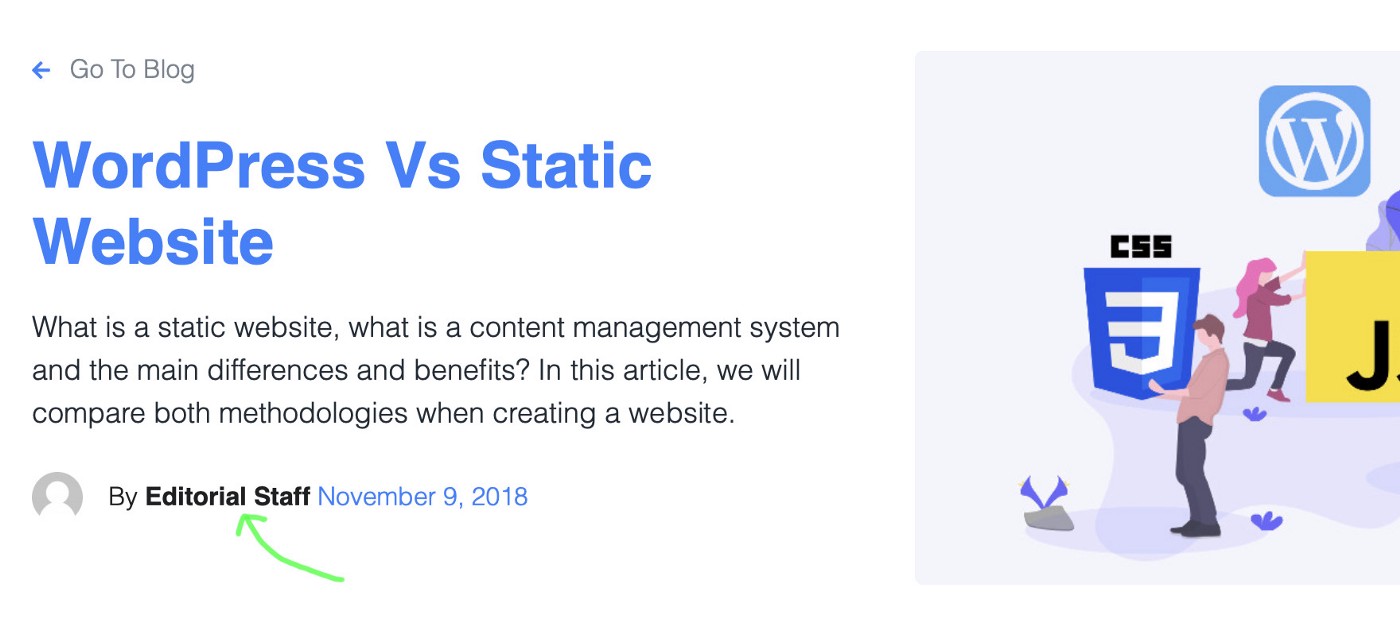
In some themes, the Nickname value is displayed in the blog posts as the author’s name and URL, as shown below.
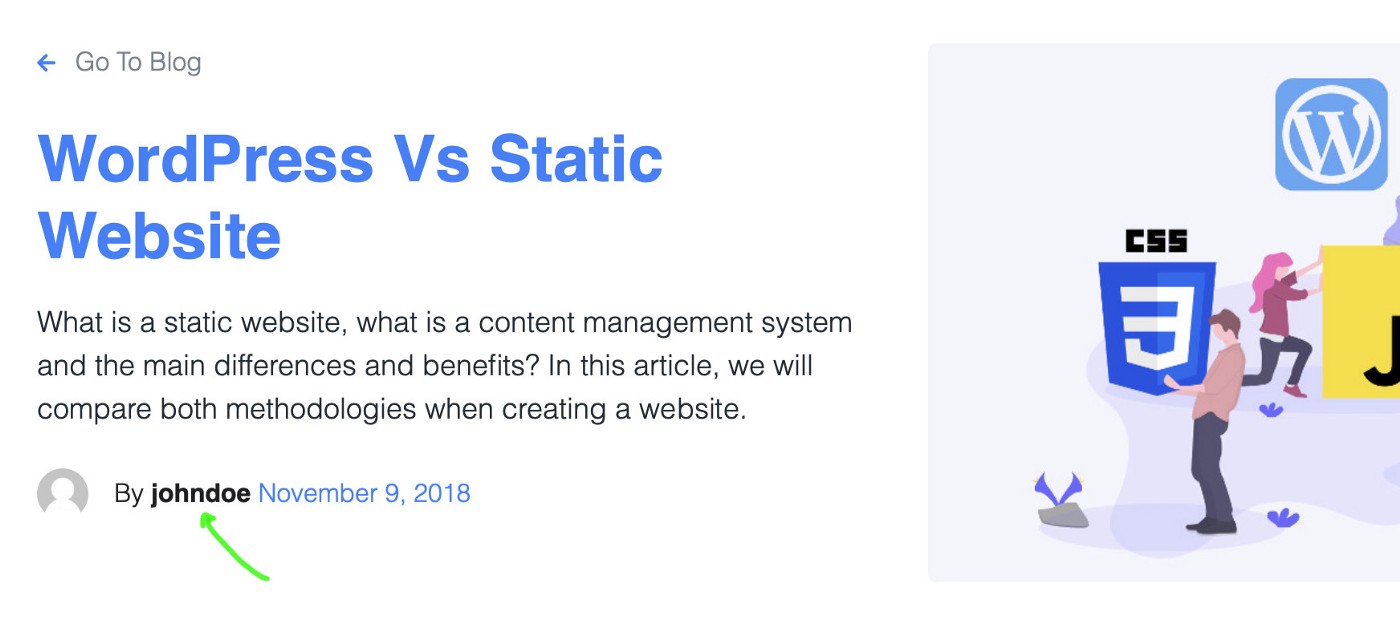
If the Nickname is not changed, then the username is displayed, which will be readily available for the world to see.
How to change the WordPress Nickname
- Go to Users and hover over the name of the user and click Edit.
- Scroll down to the Nickname section and change it to something different.
- Change the “Display name publicly as” to the new Nickname.
- Save your changes.
For example, You’ve seen some websites display Editorial Staff for all their articles or blog posts.
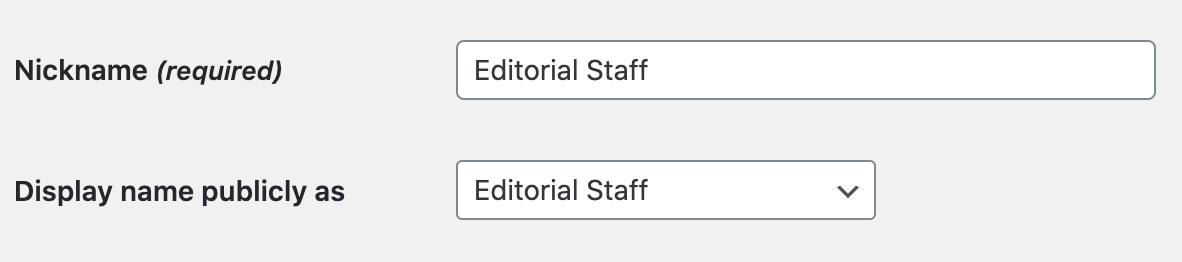
Once you save the changes, you should see something like this:
The username may still be accessible as there are other ways to retrieve it, and unfortunately, it’s super easy.
Methods of getting WordPress usernames
Method 1: Clicking on the Nickname
Depending on your theme, your displayed name text may be inside of a hyperlink — a link to the author’s page.
WordPress default structure for the author’s page is domainname.com/author/username/ where /username/ is by default both, the user_login and the user_nicename. In our example, the link will take us to domainname.com/author/johndoe/.
If enabled in your WordPress theme, an attacker can get your username by simply clicking in the author’s URL. We need to either change the user_login (username) or user_nicename directly in the database to fix this.
How to change the WordPress user_nicename directly from the database using PHPMyAdmin
- Go to Cpanel > Databases > PHPMyAdmin.
- Click the name of the database for your site to expand it.
- Click on the
wp-userstable. - Click Edit on the user you want to change.
- Change the
user_nicenameto something different other than the value ofuser_login.
Even if you don’t use the WordPress blog feature, publish articles or posts, there is still another way to retrieve WordPress usernames through the query parameter.
Method 2: Adding the /?author=1 query parameter
Anybody can easily guess not only your username but the username of most of the users in your WordPress site by simply adding /?author=1 at the end of the domain name.
The number 1 represents the id of the user. If not user is found, then an attacker can try different id numbers. For our example, example.com/?author=9 will redirect to example.com/author/johndoe/.
To fix this, simply add the following code to you .htacces file:
RewriteEngine On
RewriteCond %{REQUEST_URI} !^/wp-admin [NC]
RewriteCond %{QUERY_STRING} author=\d
RewriteRule ^ /? [L,R=301]
RewriteEngine On enables URL mapping or routing, RewriteCond %{REQUEST_URI} !^/wp-admin [NC] checks if the current URL is not the admin area of WordPress, and RewriteCond %{QUERY_STRING} author=\d checks if the requested URL contains the author query string and if this is true, then the RewriteRule ^ /? [L,R=301 ] redirects to the home page.
In simply words, any server request similar to /?author=1 will be redirected to the homepage.
Method 3: Adding query parameters
Query parameters, also known as query strings, are a defined set of parameters attached to the end of a domain URL. They serve to identify specific content or actions based on the data being passed.
Query parameters can be used by attackers to retrieve information from a web server, which can lead to security attacks.
In the next WordPress security tip, I will help you disable query parameters in WordPress without a plugin.
#6 Disable WordPress JSON REST API EndPoints
The WordPress REST API allows developers to create communications and connections with other sites and applications.
There is a lot of information available through the WordPress REST API, and you can start requesting it by merely using a browser.
Open a browser, and enter the following URL:
domainname.com/wp-json/wp/v2/users/
You will get the full list of users’ data, including usernames If the REST API JSON endpoints are enabled.
If you need to look up a specific user data, just add the user id like this:
domainname.com/wp-json/wp/v2/users/9
In our example, we get this:

Through the WordPress REST API JSON endpoints we get access to a full range of users data, including all usernames — and that’s concerning. Let’s fix that.
Open your functions.php file and add the following code:
function disable_rest_endpoints ( $endpoints ) {
    if ( isset( $endpoints['/wp/v2/users'] ) ) {
        unset( $endpoints['/wp/v2/users'] );
    }
    if ( isset( $endpoints['/wp/v2/users/(?P[\d]+)'] ) ) {
        unset( $endpoints['/wp/v2/users/(?P[\d]+)'] );
    }
    return $endpoints;
}
add_filter( 'rest_endpoints', 'disable_rest_endpoints');
Now, if we try to go to domainname.com/wp-json/wp/v2/users/ we get a 404 server response as shown below:

You can also install the Disable REST API plugin which works out of the box.
#7 Disable File Editing from Admin Panel
WordPress allows you to easily edit your current theme and plugin files straight from the admin area with the built-in code editor by going to Appearance > Theme Editor.
Now, this is very convenient, but if not used correctly or in the wrong hands, it can lead to security problems, human coding errors, and other vulnerabilities.
Tip:
I recommend editing your WordPress theme and plugin files directly from Cpanel in your hosting account or by creating an FTP account using the Filezilla mac app. .
How to disable file editing in the WordPress admin dashboard with code
All it takes to disable the theme and plugin editor is one line of code. Open up your wp-config.php file and add the following line of code towards the end of the file:
define( 'DISALLOW_FILE_EDIT', true );
Save your changes. That’s it, a simple way to disable theme file editing within your WordPress admin area without a plugin.
#8 Disable PHP File Execution in Certain WordPress Directories
WordPress makes some directories writable by default. Some of your themes and plugins may need this type of access to function correctly. Nevertheless, it is a good idea to review and protect specific directories, including the wp-includes and the uploads folders for added security.
/wp-includes folder
Other than your standard WordPress updates, the wp-includes folder (which holds the core WordPress files) should never be modified, and ideally, it should be read-only.
/uploads folder
The wp-content/uploads folder stores all the images and media uploaded through the WordPress media library in your site.
Not protecting these directories can lead to security vulnerabilities, including backdoor attacks, where hackers can spread malware by running custom scripts to get access to your site and databases.
How to disable PHP file execution in the wp-includes and uploads folder
Disabling PHP code execution in specific directories is a pretty straightforward process using a .htaccess configuration file on those directories.
The .htaccess files of your WordPress website provide high-level configuration settings, including the redirection of specific URLs, the forcing of HTTPS connections, and password-protect particular directories on your file system to mention a few.
To disable PHP file execution in the wp-includes and uploads folder, we need to upload a .htaccess file inside those directories. If you don’t have one, create it and add the following code:
# This file should be uploaded inside /wp-includes/ and /wp-content/uploads/ only
<Files *.php>
deny from all
</Files>
Note:
Please note that this .htaccess file should be uploaded inside the wp-includes/ folder and the /wp-content/uploads/ folder only. Do not add this to the root .htaccess file.
There you have it — a simple way to protect those two folders from backdoor attacks and mitigate vulnerabilities.
#9 Disable directory listing/browsing
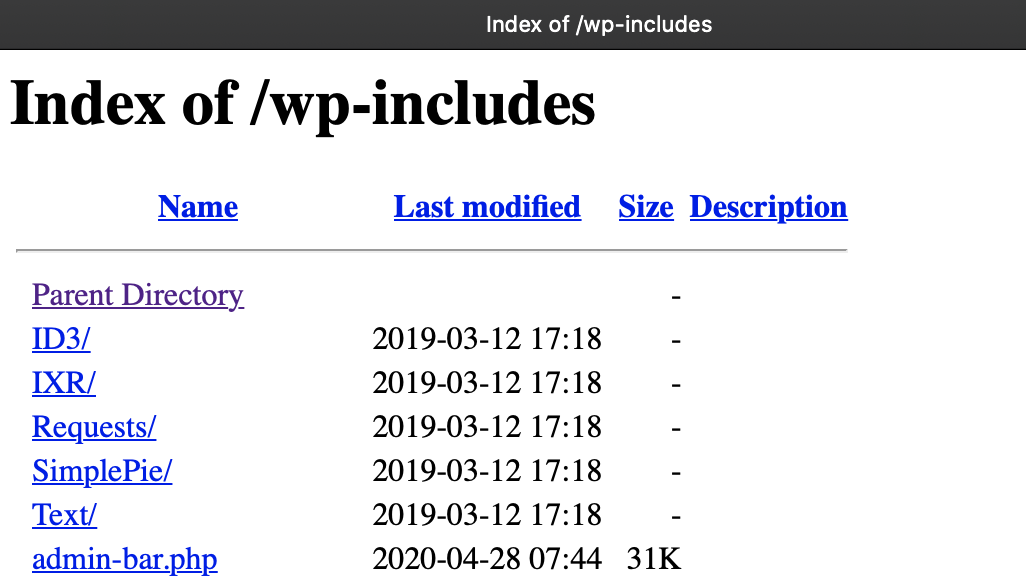
When enabled, the directory listing will display the contents of individual directories (folders) on your website for everyone to see.
Directory listing could open the doors to possible security vulnerabilities as attackers can easily browse your server, theme, and plugin files.
The easiest way to check if directory listing is enabled is by appending a folder or directory to your domain URL. For example, http://yoursitename.com/wp-includes/, and if you can see files and folders as shown below, then directory listing is enabled.
Some hosting providers disabled directory listing by default, which is a good thing. If you are still able to access the directories and files, simply add the following line of code to your .htaccess file towards the end of the file.
Options All -Indexes
If you don’t have a .htaccess file, simply create one inside the directory you want to disable directory listing and add the previous line of code.
If you now visit http://yoursitename.com/wp-includes/ you should see a 404 page or an access forbidden page.
As you can see, this is a straightforward solution for a severe security vulnerability that can lead to website hacking and file stealing.
#10 Bonus WordPress tips and recommendations
Below are some tips and recommendations I find useful when developing WordPress websites:
- Change the table prefix for WordPress
- Use strong passwords and hard to guess usernames.
- Enable Two-factor Authentication.
- Change your WordPress login credentials regularly.
- Keep your WordPress, themes, and plugins up-to-date.
- Delete and remove unused themes and plugins.
- Install quality WordPress security plugins.
- Use reputable and quality hosting providers.
Conclusion
WordPress security is an essential part of your website development process. Implementing these techniques will not only make your site more secure but will increase performance and improve search engine rankings.
I hope this article helps you secure your WordPress website against attackers, and have provided some new security techniques to use on your next website development projects — Happy coding.